It's finally here! Sorry it took so long to post this DIY busy week of relaxation! :)
Pinerest! What a lovely dangerous thing! Gobs and Gobs of fun ideas and everything in between! Some how it's a thief because it continuously takes away hours and hours of my days:) Am I the only one? I was looking for something personable for my two boys' rooms!
Well this lovely DIY was inspired from some Pinterest loveliness.
I love the personal characteristics of each of the boys it shows! It's important to remind our children how important they are and how unique and gifted God made them as individuals.
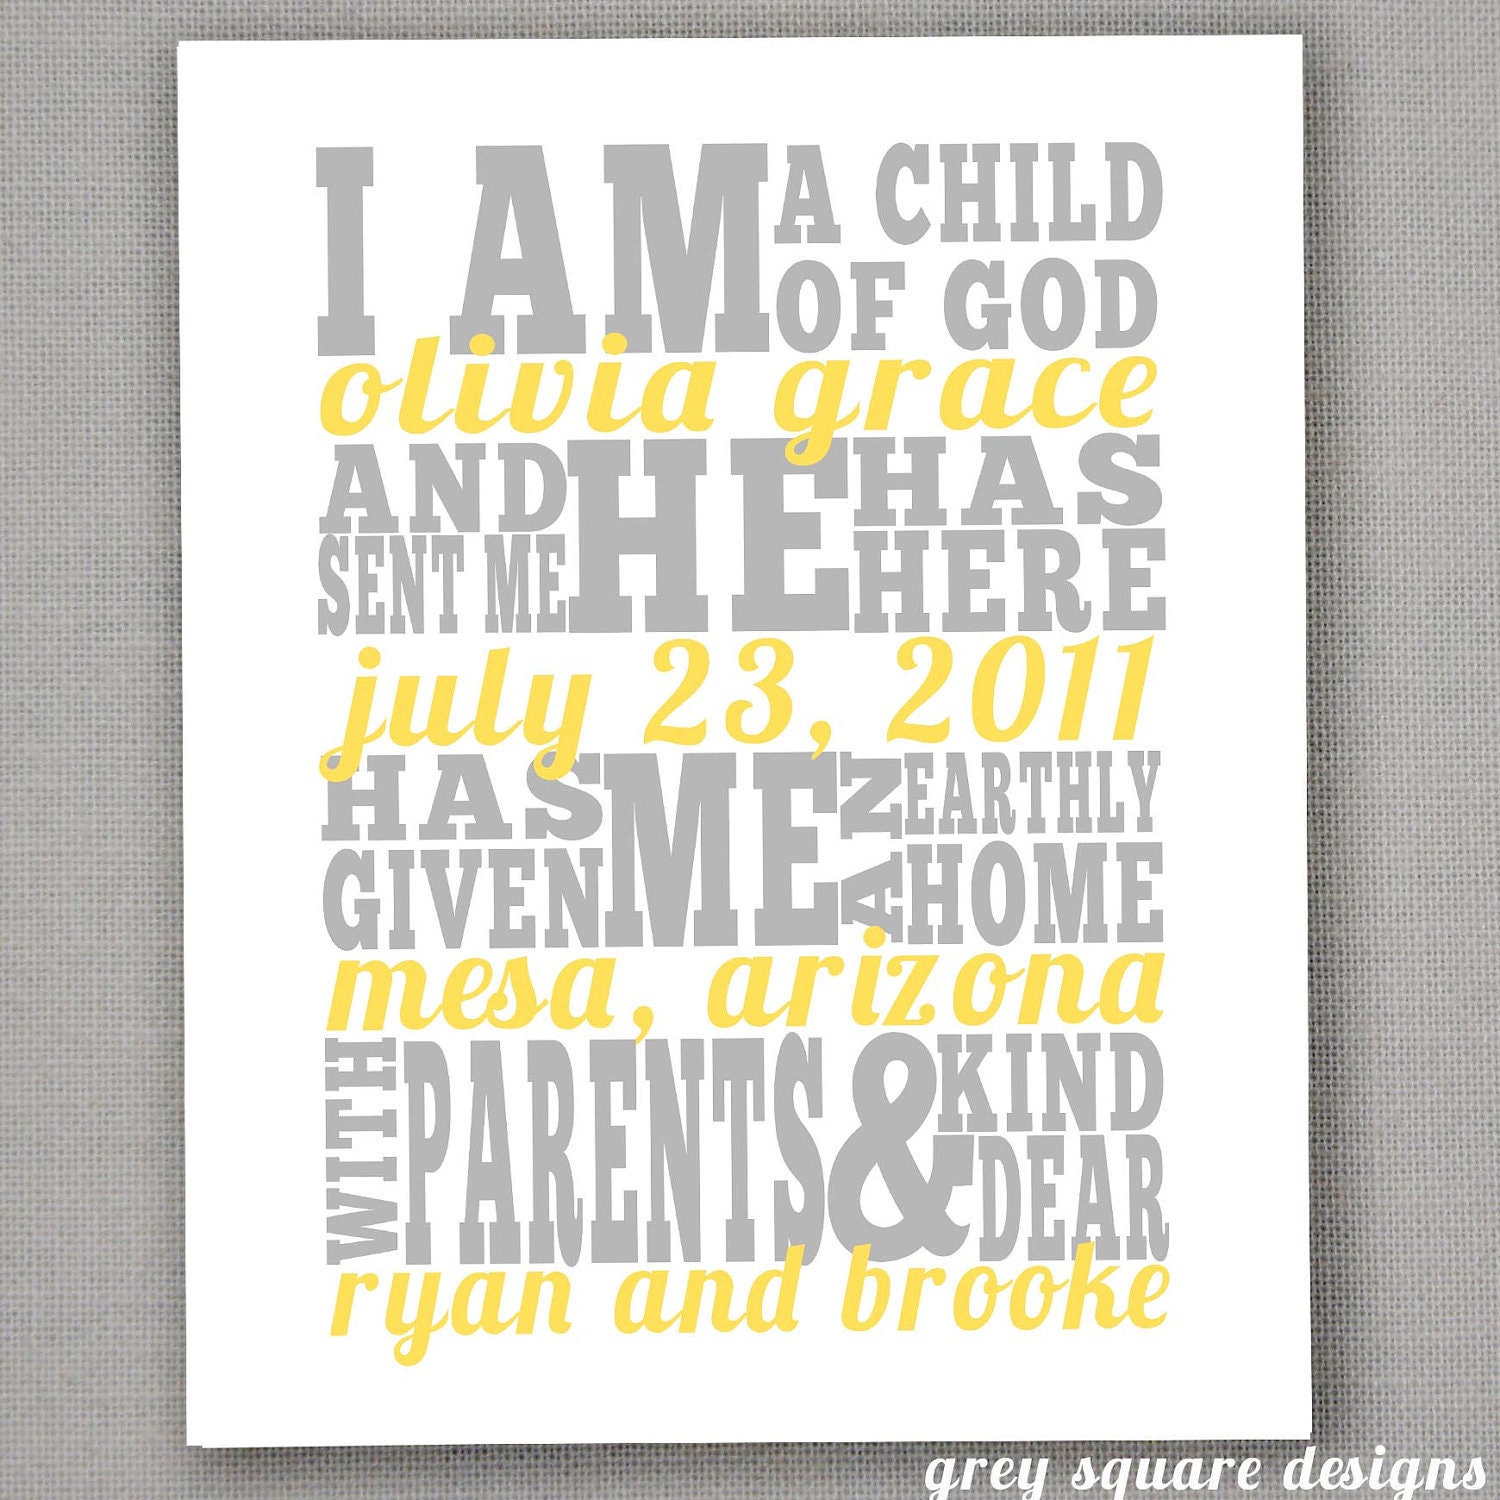
The Second canvas, we'll call it the "Child of God" canvas; inspired from this lovely etsy shop Grey Square Designs.
I love the modern way of showing a "Birth Certificate". I added the bible verse at the bottom because I wanted to add scripture back up.
I'm not quite sure the program she uses to make the canvas' but I played around on Picnik and figured out a way to do this subway inspired art without any special program but the internet!
Go to Picnik and upload any picture. Go to "effects" and scroll down to the "doodle" option. Cover the entire picture with color background of choice. Next, go to "Text" tab and select whatever font desired. I used Geosanslight under the "Holiday Fonts" tab. I then faded some of the words to give different tint effects and different colors to match the room. Create. Save to computer.
SUPPLIES
* Modge Podge (I used matte modge podge)
* 11x14 Canvas (I used a dual pack from Michaels at %40 off)
* Old paint brush (used for modge podge application)
* Cardboard (or any type of backdrop to work on)
* Photos
* Spray Paint or Acrylic Paint
* Dry Rag Clothe
First step I took the canvas to a well ventilated area (my garage) layed down drop clothe and spray painted the edges about 2 inches in. No need to spray the whole canvas because the center will be covered with photo art. Let dry go gold some laundry. I did a few coats.
Second Step, I took the dry canvas and applied modge podge to the center general area and then immediately applied modge podge to the back of the entire photo; all the way to the ends and edges.
Next place photo onto canvas and use dry rag clothe to position to desired place on the canvas and gently press and smooth out photo onto canvas. I did not push hard at all and ever so lightly smoothed it out. Let dry. I went and dusted the house; put away some laundry. Approximate time was around 20 minutes.
This is what you will have now; it will look something like this.
Almost Final Step apply a coat of Modge Podge to the entire canvas front and sides. I did a fairly light coat. and let dry completely. I then went and did some more house work :) Approximate time was around 30 minutes. Fear comes over you as you see the foggy reside over the photo; but it will clear up I promise you!
Here is a photo of the Modge Podge slowly drying.
Final Step (sorry no photo) is spray with a clear coat of protective acrylic. This will seal it and protect it.
You're done! Viola! Sit back and Enjoy the beautiful art created by YOU!
I hope everyone had a fabulous first week of 2012 as much as we did on our "vacation" off :)
If you did it; please share! Different fonts? Different layout? Different Colors? Share your works of art on our facebook page!
Have a lovely week and Blessings!


